Makes one 8″ round cake
Share this article…
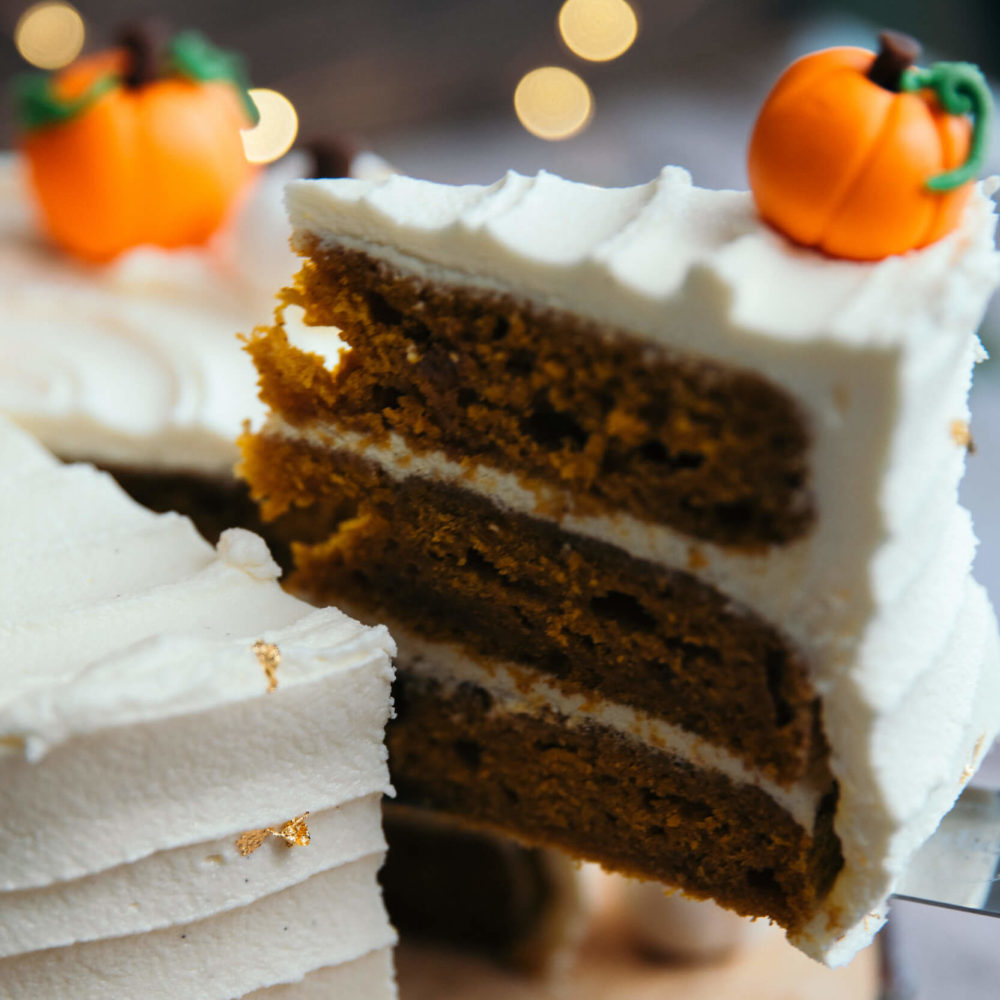
This adorable pumpkin patch cake is so delicious. The little sugar pumpkins nod to the flavour inside as it is made with pumpkin puree. You can use this from a can or simply make your own with squash or pumpkin flesh by just steaming until tender, cool and then blend. For this recipe I’ve given a homemade pumpkin spice mix which you can also use in hot drinks, frostings, or other bakes.
The pumpkins are made using fondant icing (sometimes called ready to roll icing or sugar paste) and you can easily get pre coloured icing at the supermarkets or online. To make the cream colour you can knead in a tiny bit of yellow and brown icing or food colouring into white to create the creamy shade if you want to make cream and orange shades as shown, or simply use orange if you prefer.
Equipment
- 3 x 8” round cake tins, base and side lined (or do in batches)
- Large mixing bowl
- Stand mixer or electric hand whisk for the buttercream (or do by hand with a wooden spoon)
- Whisk
- Palette knife/knives
- Cocktail stick or modelling tool to mark the pumpkin sides
- Cake plate or stand
- Cake turntable (optional)
For the sponge
- 280g self-raising flour
- ½ tsp salt
- 1 tbsp pumpkin pie spice mix (recipe above)
- 180ml vegetable oil
- 4 medium eggs
- 225g golden caster sugar
- 325g pumpkin puree
- 1 tsp pure vanilla extract or bean paste
- ½ tsp baking powder
For the cream cheese frosting
- 450g soft butter
- 900g icing sugar, sifted
- 150g room temp cream cheese
- 1 tsp vanilla extract or bean paste
For the decoration
- 100g orange fondant icing
- 100g cream coloured fondant icing
- 25g brown fondant icing
- 20g green fondant icing
- A touch of edible gold leaf (optional)
For the homemade pumpkin spice mix
- 3 tbsp ground cinnamon
- 2 tsp ground ginger
- 2 tsp nutmeg
- 1 ½ tsp ground allspice
- ½ tsp ground cloves
Method
If you fancy making the sugar decorations, it’s a good to make these in advance.
For the pumpkins it’s simple to make different sizes by rolling different size balls and flattening out slightly or hand moulding to make various shapes as shown. Then make the markings on the sides with a modelling tool or cocktail stick. Make a little hole at the top and hand mould a little stem with some brown icing and stick in place by tapering the end to a point with your fingers and gently pushing into the hole. If you need to add a tiny dab of water to help stick into place. Leave to set on a board or plate dusted with a little icing sugar so they don’t stick. You can do this in advance if you wish they will last for ages as they are just sugar, I usually do mine the day before, so they set firmly overnight. Id you’d like to see a video of how to do this I have one on my Instagram, @julietsear.
To bake;
1. Preheat the oven to 170 degrees fan. Grease and line the tins with baking paper on the base and use strips to go up the sides.
2. In a large bowl mix together the oil, sugars, eggs, vanilla and pumpkin puree.
3. In a separate bowl mix together the flour, salt and pumpkin spice mix.
4. Pour the dry ingredients into the wet and whisk until combined.
5. Divide the mixture into the prepared tin/s and bake for approx. 25-30 minutes until the cakes are risen and golden and when a skewer or sharp knife pushed into the centre comes out clean. Allow to cool in the tins for 5 minutes then turn out onto a cooling rack, remove the paper, and leave to cool completely.
6. To make the buttercream place ⅕ of the icing sugar in the bowl of a stand mixer or large bowl and then add the butter. Mix on a low speed until the butter is incorporated and then turn up to a high speed and beat until light and fluffy. Alternatively make the buttercream by hand with a large mixing bowl and wooden spoon.
7. Add half of the remaining icing sugar and mix on slow until incorporated, then turn up to a high speed and beat again.
8. Add the remaining icing sugar and repeat the process.
9. Finally add the cream cheese and vanilla and beat on slow until smooth, light and creamy. Cover and set aside.
To assemble and decorate;
1. It’s easiest to do this with a crank handled palette knife but it’s not essential. This cake is iced in a rustic style with texture around the sides, so don’t worry about it being super neat, and of course we will be adding pumpkins over the cake, so this really helps to hide any imperfections by strategic placement of the pumpkins.
2. If your sponges have any humps, trim them off to level and neaten first. Place the first layer onto your cake stand or plate (fix with a little smidge of buttercream to secure) and spread over a layer of frosting. Top with a second layer and repeat with a layer of frosting.
3. Place the last layer on top, invert the sponge so that the smooth flat side that was in the bottom of the tin is uppermost, this makes it easier to keep neat. Use the palette knife to spread some of the frosting all around the sides of the cake first (this allows you to be able to hold the top of the cake still while you work around the cake) . Use a gentle pressure against the side of the cake with the palette knife and use a back and forth spreading motion to coat over the sides. This fills the joins in between the sponges and gives a thin coating to seal the cake crumbs in, before we do another coating. If you have a cake turntable it does make it a bit easier by spinning the cake around, but it’s not essential.
4. Once the side is covered, spread a nice even layer over the top of the cake.
5. Once the whole cake is covered, clean the palette knife, and go around the cake again to smooth off the excess icing, spreading it until you are happy that it’s nice and neat. This is called a crumb coat. Pop this into the fridge to chill and firm up for about 30 mins to an hour until it is set firmly.
6. For the final layer, cover over the cake with slightly thicker coating. Pile a generous amount of frosting on the of the cake and use a palette knife to push it over the top and sides, getting it as neat as you can. I’ve used a small palette knife to create lines around the cake by running it around the edges to swoosh through the frosting up the sides and creating a swirl on top. If you’d like to see any videos for how to fill and assemble buttercream cakes, I have plenty on my YouTube channel which is https://youtube.com/c/JulietSear.
7. Lastly add your pumpkins over the top and around the sides of your cake and to finish, use a tiny bit of green icing rolled into a thin sausage to create the curly stems, and place these on the tops of the pumpkins as shown. Secure with a tiny amount of water to help them stick if you need to. Add some little flecks of gold leaf using the end of a sharp knife or small paint brush and place them on the pumpkins and icing.
The cake will keep in the fridge for up to 3 days. Bring to room temperature before eating. Enjoy!
Share this article…


